Website owners at times come to a point where it is time to refresh their website looks. In some cases, face-lifting can be just the right thing, and in those cases, a change in the WordPress theme can be a way to go. In more radical cases, a complete re-vamp of the branding may be the way in which the website master decides to go, and this process may include even brand and domain change.
In both cases, an adequate backup plugin is an indispensable tool that should be used to make the migration process secure and stress-free. For the first case, a backup creation before any major changes on the site is a mandatory step to secure the website from loss. In the second case, a migration feature is a follow-up step to backup creation, that the same tool should accomplish.
We have the perfect plugin for both of these use cases: Backup Migration. We picked it because it is super-easy to use and it has a beautiful, user-friendly interface, which will make the process a breeze even for WordPress beginners. In this article, we will break down the process for you and will guide you on how to manage the migration without a fuss.
Backup creation process
The first part of the process is a quick one. Here is how you create the backup:
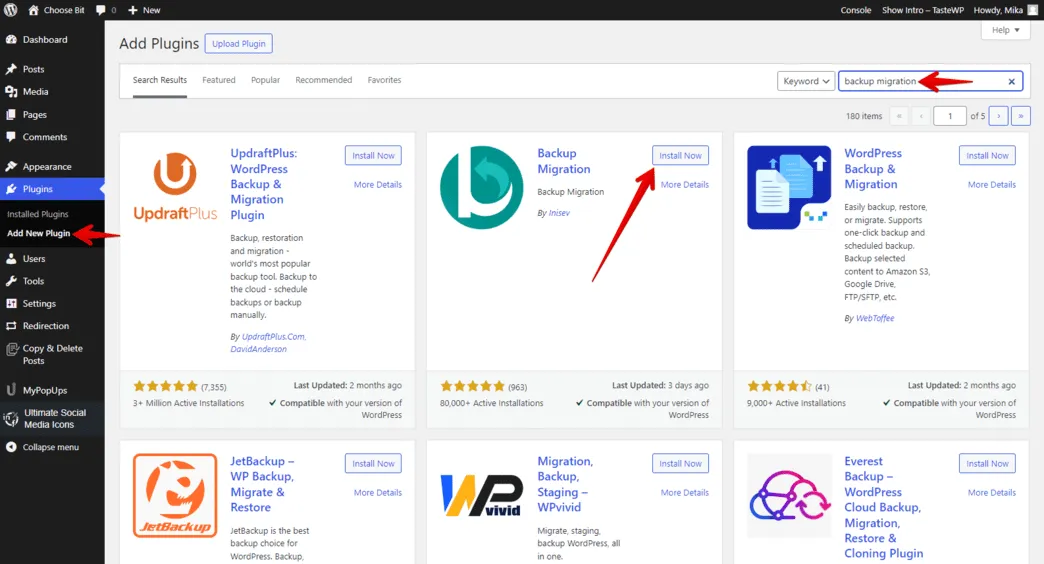
Install the migration plugin
To initiate the process, install the Backup Migration plugin on your source site. You have two straightforward choices: either swiftly through the WordPress Dashboard or by manually downloading and installing it from the WordPress plugin directory found at https://wordpress.org/plugins/backup-backup/.
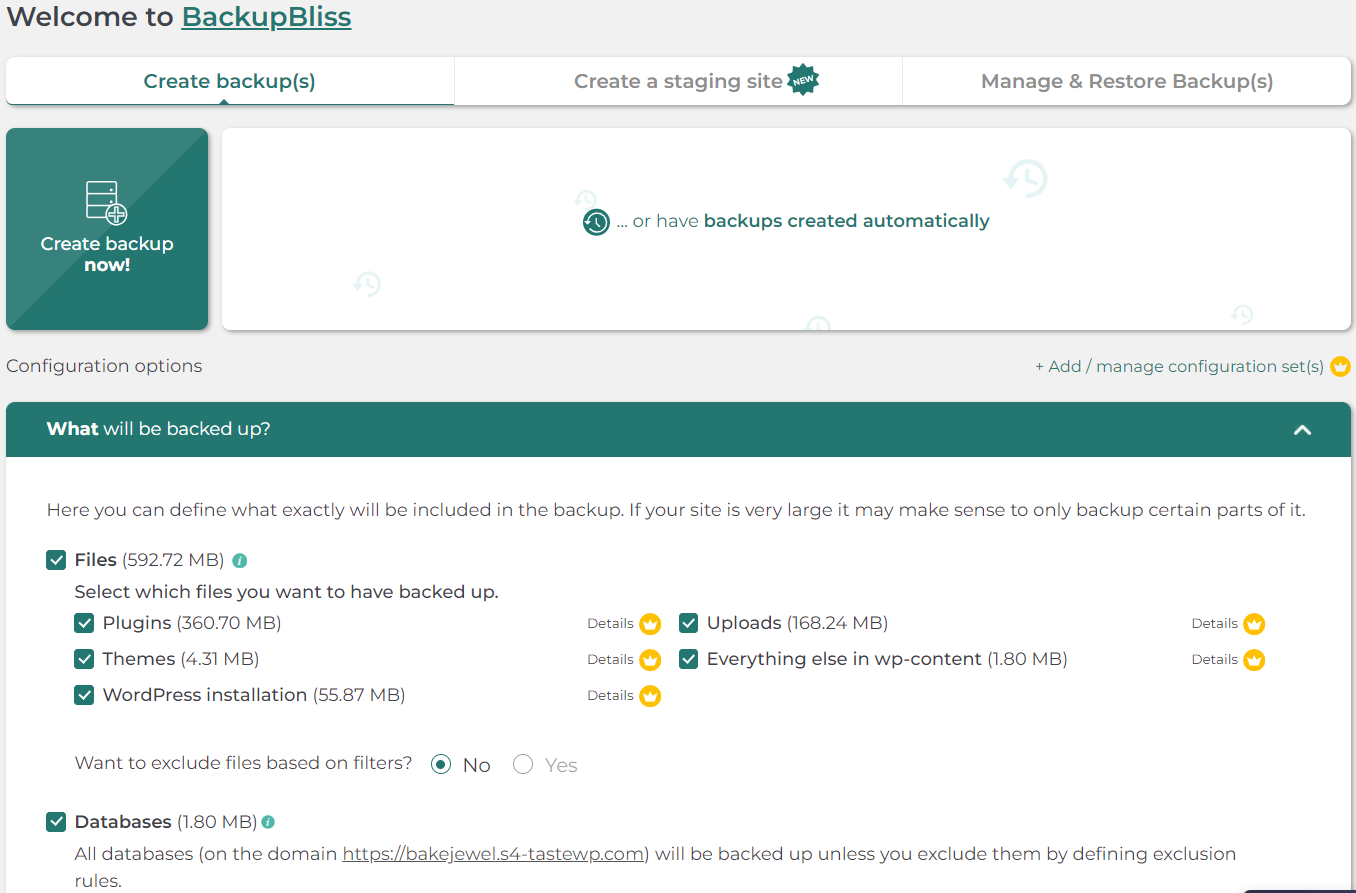
Navigate to the Backup page
After activating the Backup Migration plugin on your website, it will automatically redirect you to its menu page in the WordPress Dashboard. Navigate further to the plugin section “What will be backed up?“. For a complete backup, select all files, folders, and databases without any exception rules. After that, click on the “Save” button to apply the settings.
Create a new backup
With a click on the “Create backup now!” button, the plugin kickstarts the backup process, swiftly wrapping it up within a minute or two in case of smaller sites. Nevertheless, for larger websites surpassing 2GB, opting for the premium version of Backup Migration might prove beneficial. Once the backup process is finalized, it’s advisable to download the backup file to guarantee you possess a secure local copy.
Migration process
The migration process, the second act in this sequence, is being enacted on the destination site, which you should set up in advance.
Many contemporary WordPress hosting providers now offer a convenient WordPress instance launch feature. It’s advisable to check for this option with your hosting provider. If this feature isn’t available within hosting, you’ll need to resort to an alternative method, such as a manual WordPress setup.
Follow these migration steps on the destination site:
Install the migration plugin on new site
Install the Backup Migration plugin the same way you did on the source site and navigate to the plugin’s menu screen.
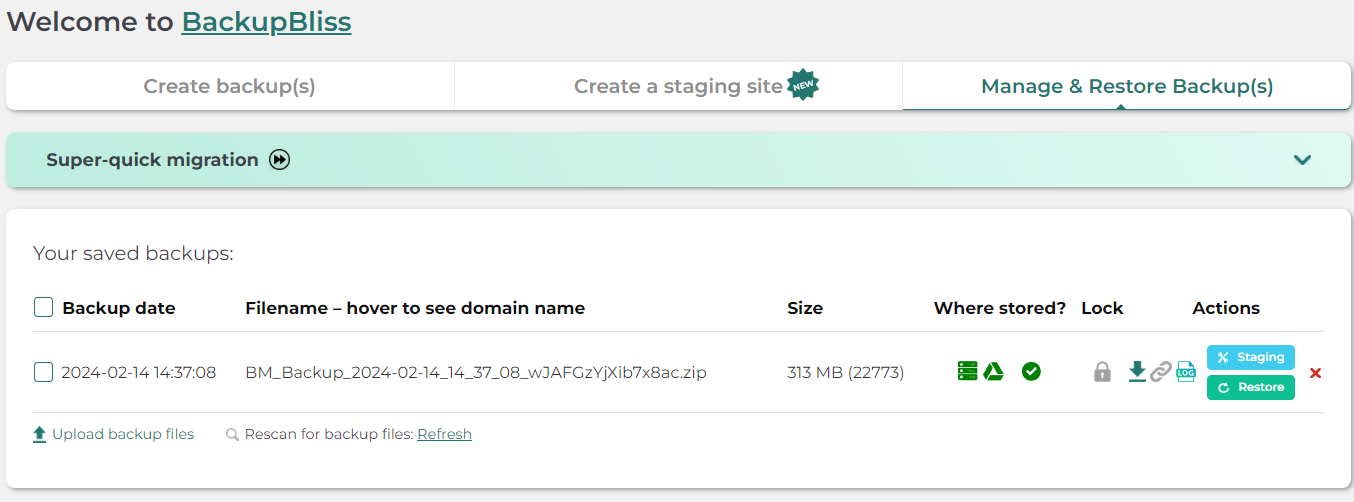
Navigate to the Restore page
Head to the plugin section “Manage & Restore Backup(s)“, where you can find three restoration options, designed to fit your specific case:
I. Super-quick migration
This is the right option if you’re moving your website to a new domain. All you need to do is paste the backup file’s link from the source site and click the “Restore now!” button. Links to backup files can be easily copied from the “Manage & Restore Backups” plugin section.
II. Manual upload of backup file
You can manually upload backup (zip) files with this option. You can manage this by either navigating and selecting the file for upload or by using the drag-and-drop method. As your backup file is uploaded to the new website, start the restoration process by clicking on the “Restore” button, next to the listed backup file.
III. External storage
Keep your backups safely stored on the cloud with this option. Google Drive is currently available, with additional cloud storage coming soon. You can connect your Google account in the plugin section “Where shall the backup(s) be stored?“, which will automatically synchronize your backup files from your connected websites. Again, clicking on the “Restore” button will commence the restoration of the designated backup file.
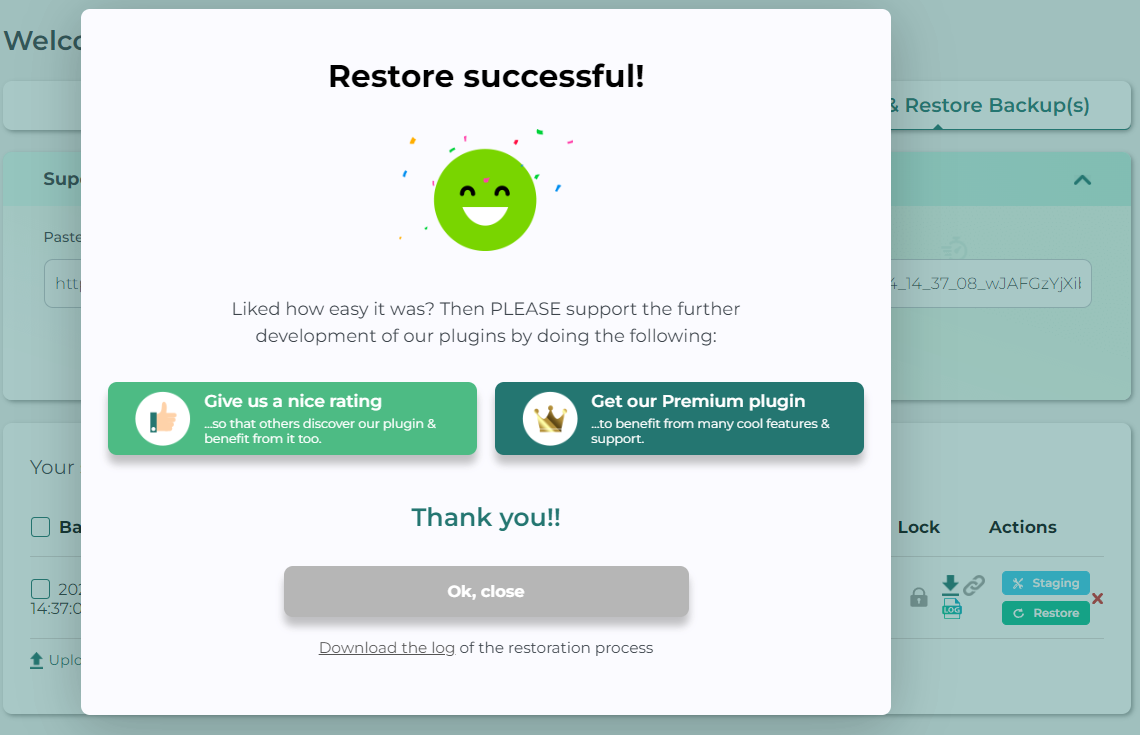
Once you have completed all these steps, your migration process is finished, and your source site is ready to be used at the new harbor.
In conclusion
Previously, migrating a WordPress site often necessitated seeking paid assistance from professionals or hosting agencies offering additional services. However, nowadays, site owners can confidently handle this task independently and securely, without significant time or resource investment. Streamlined migration tools like the Backup Migration plugin minimize required steps and reduce the time spent by webmasters.
Moreover, this plugin offers more than just migration assistance. With integrated automatic backup features, scheduling backups becomes a logical next step once the new site has been established.
In case you would like to check out how your website would look with another theme, we suggest that you try out another cool feature of the Backup Migration plugin – staging sites. It will allow you to quickly make a clone of your site, play all you want, without any consequences, and remove the clone just as easily. Feel free to test out all features of this amazing plugin on a free test site: http://demo.tastewp.com/bmi.