
WordPress, the used content management system powering websites globally, offers the flexibility to change website appearance and functionality through themes. These themes permit you to adjust the plan, design, and general look of your website without changing its substance or construction.
Here, we will investigate some techniques for introducing WordPress themes: utilizing the WordPress Repository, the WordPress Dashboard, and FTP.
Getting Started
Before we plunge into establishment guidelines, how about we initially comprehend what WordPress themes are?
Themes comprise records that control utilitarian parts of your website. They decide the format, variety plan, typography, and extra functionalities of your webpage, with a great many premium themes accessible taking special care of configuration styles and website objectives.
What to Do Before Installing a WordPress Theme
To guarantee a seamless and effective setup, it’s imperative to take a few preparation measures before beginning the WordPress theme installation process.
Choose the Correct Theme
One of the most important steps in creating a website is choosing a WordPress theme. It entails taking into account a number of variables, including the nature and goal of your website, the traits of your intended audience, and the particular features you need.
Check out the comprehensive guide to selecting a WordPress theme, which covers important factors such as ease of customization, SEO-friendliness, and responsiveness for the best mobile reading experience. Go through their in-depth guide here to get insightful knowledge.
Check Out the Theme Demo
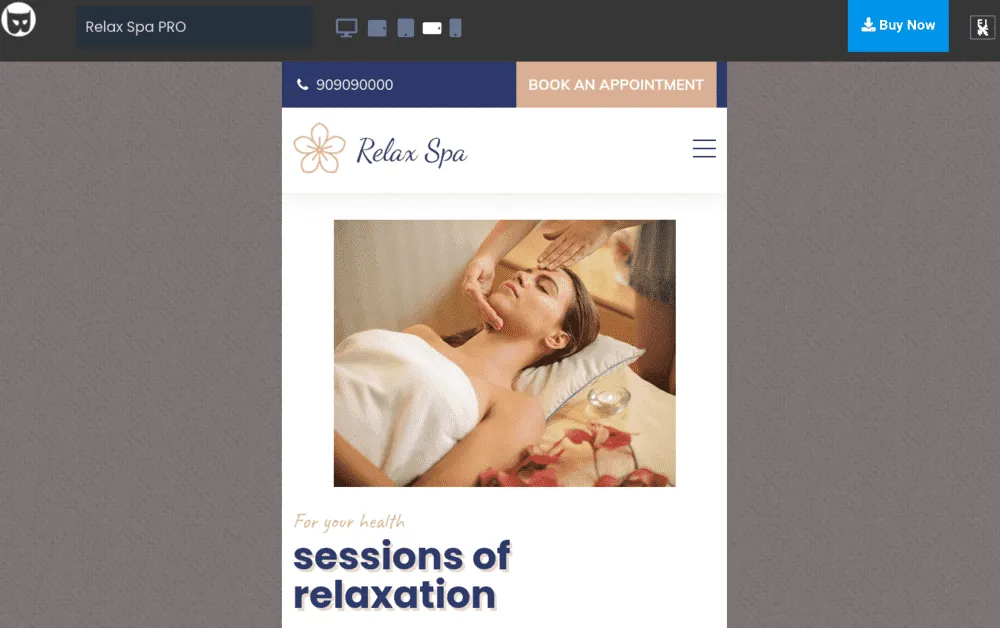
The theme demo is usually linked from the theme product page. It provides a virtual sneak peek at how your website will appear and work after it is installed.
Spend some time carefully reviewing the sample, focusing on elements like color schemes, layout, and general design aesthetics.
It is imperative that the demo contains the features you would like to see on your website so that you have a concrete idea of what to expect.
Create a Staging Site
Establishing a staging environment should be considered prior to making any modifications to your live site. You can thoroughly test the theme’s functioning and compatibility on this replica version of your website without having any negative effects on your main site.
A lot of hosting companies give tools that make setting up a staging site easier. This preventive measure guarantees a smooth transition should you want to implement the theme on your live website.
Step 1: Download Theme from the WordPress Repository
The theme repository serves as a haven for a range of themes catering to genres and creative objectives. This source offers both paid options, providing website owners with choices. Navigating through this digital treasure trove is simple; here’s a guide:
Step 1: Open The Repository Page
Begin by visiting the WordPress theme repository using your preferred web browser.
To find WordPress themes, simply type in “WordPress themes” on your search engine. Alternatively, you can open the themes repository with this URL:
https://wordpress.org/themes/Step 2: Use Search And Filters Tools
When you enter the theme repository, you’ll be greeted with a display. Numerous digital art-inspired themes will catch your eye.
To navigate this collection, utilize filters like Featured, Popular, Latest, and more. You can use the hunt bar to refine your pursuit in view of catchphrases or wanted highlights.
Step 3: Check the Theme Reviews
Among the themes, one that fits your website’s aesthetic and purpose shines. When you spot a diamond, embrace it.
Clicking on the theme card reveals a rich tapestry of details about the theme. Peruse the clarification, see the screen captures, and read the client reviews to see its advantages. This lets you see if the theme fits your creative vision.

Step 4: Download Your Theme
You’ve explored the theme, so your option is apparent. Make this digital creation yours.
The “Download” button on the theme’s information page lets you get its essence.
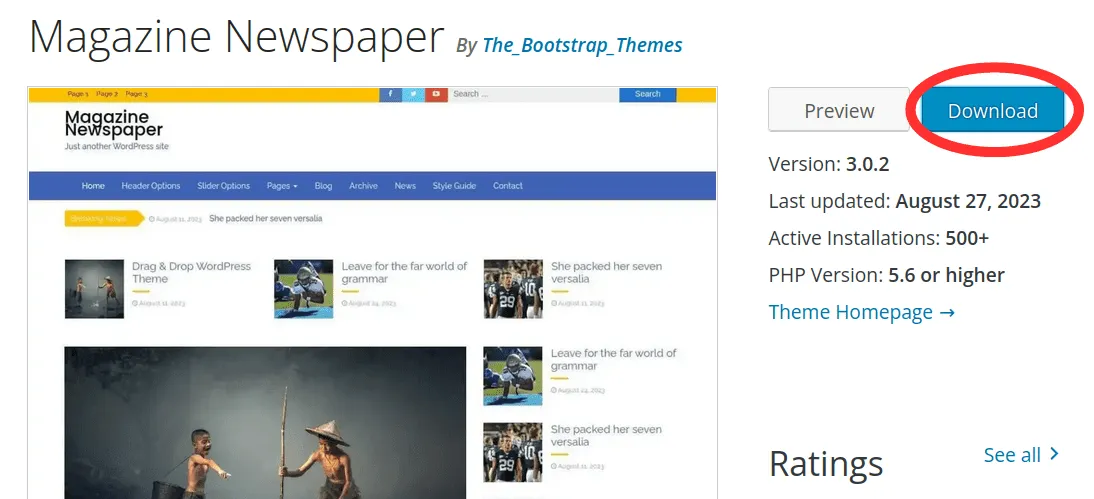
When you click this button, a symphony of data plays and the theme’s ZIP file travels from the repository to your PC.
You’re ready for creative transformation with the theme’s ZIP file in your digital library. This downloadable file can transform your website into the theme’s spirit.
Method 1: Install WordPress Theme from the WordPress Dashboard
The WordPress Dashboard makes finding the right theme for your website easy. Install WordPress theme method is the most straightforward. This extensive guide breaks down the process into manageable steps:
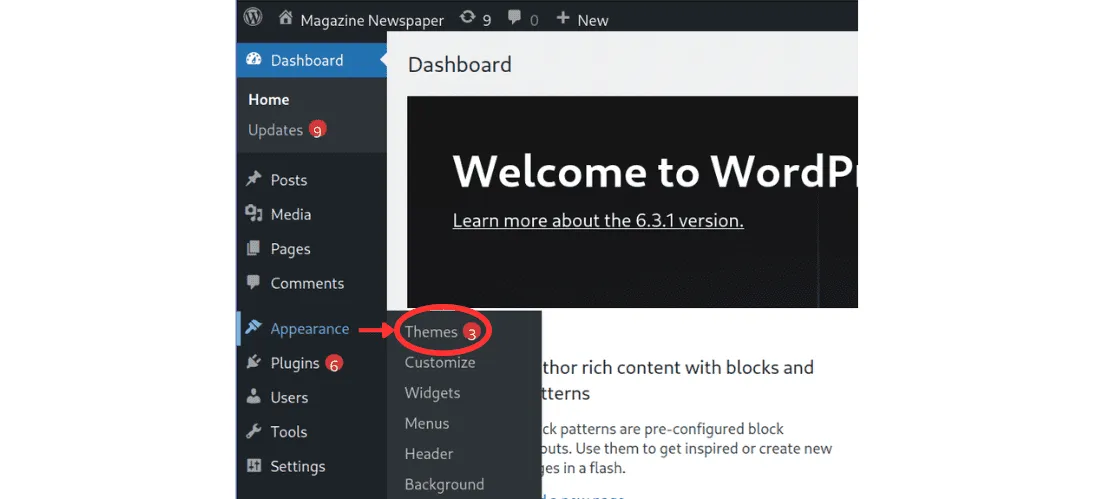
Step 1: Navigate to WordPress Dashboard
Start install WordPress theme by exploring the WordPress Dashboard. Launch your browser and add “/wp-admin” to your domain name to enter WordPress Dashboard. This is your website’s administrative and creative hub:
https://yourwebsite.com/wp-adminStep 2: Open the Themes Page
Look for the left-hand menu in the WordPress Dashboard. The “Appearance” option opens a world of visual modification. Hovering over it shows a hidden submenu with “Themes” option.
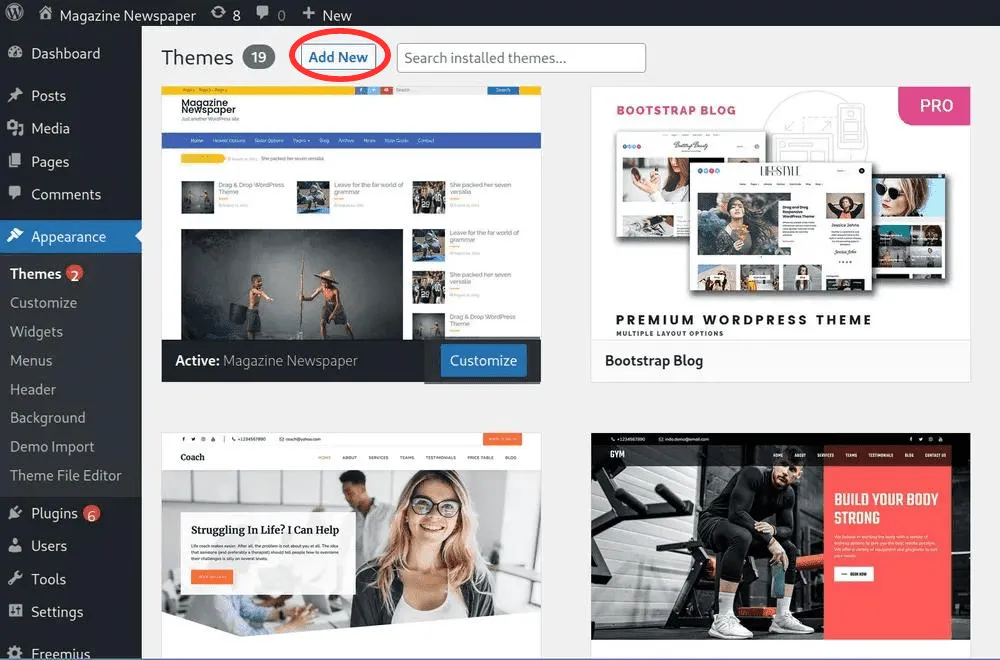
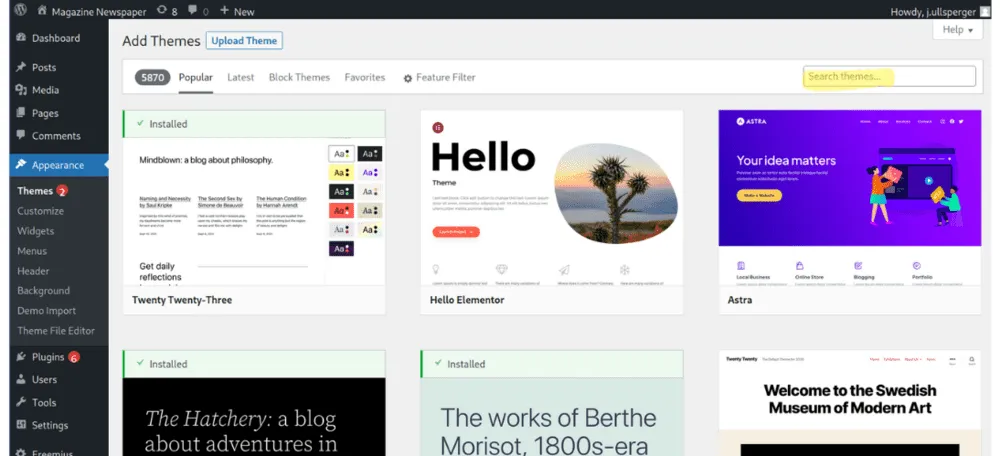
Step 3: Open “Add Themes” Page
Start your journey by selecting “Themes” with “Appearance” lit. The screen shows you many themes that can improve your website’s appearance. A “Add New” beacon at the top of the screen invites you to explore new vistas.
Step 4: Search Themes (Optional)
The “Add New” button opens the Add Themes screen, a portal to endless creativity. This is where you prepare your website’s visual transformation.
The Add Themes page offers the convenience of installing themes without manual ZIP file downloads. Simply search for the desired theme using the search field. The graphical interface is very similar to the WordPress Repository.
Should you have already downloaded the theme, feel free to skip this step.
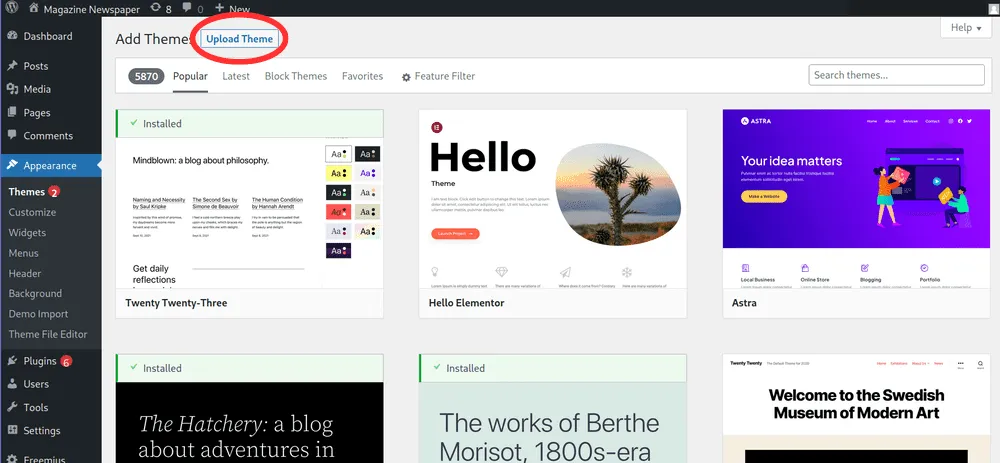
Step 5: Open “Upload Theme” Page
An “Upload Theme” button awaits you if you’ve downloaded the theme ZIP file to your computer from external sources, such as the WordPress Repository or another reputable platform. Using this button is like unlocking a new dimension.
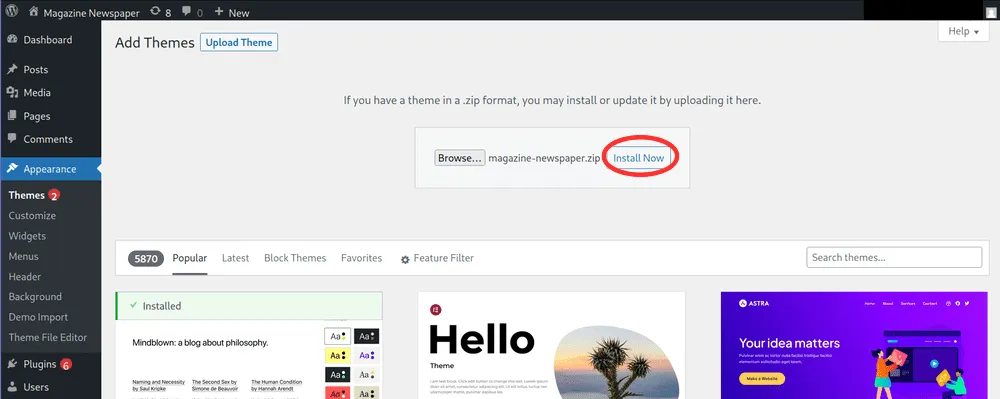
Step 6: Upload Your Downloaded Theme
After choosing a downloaded theme, you’re ready to integrate it into your website. A “Choose File” button connects your computer to the new theme’s ZIP file. This bridge between your gadgets prepares for the shift.
With your theme’s ZIP file, click “Install Now” to let WordPress take over. The theme uploads and install WordPress theme quickly, creating your website’s visual tapestry.
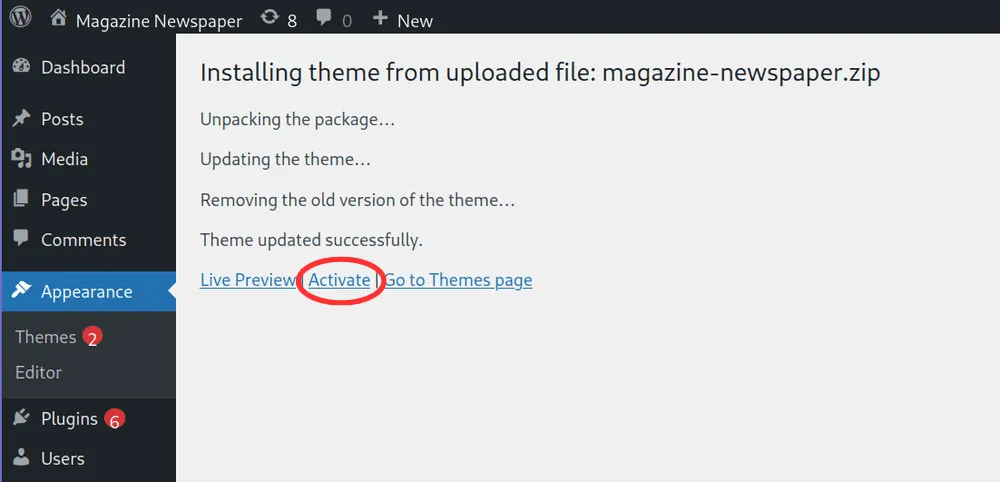
Step 7: Activate Your Theme
In this symphony’s climactic crescendo, the “Activate” button completes the install WordPress theme. It only takes one click to make your theme part of your website’s identity.
Method 2: Install WordPress Theme via FTP
FTP is used to install WordPress themes for advanced users or when the WordPress Dashboard isn’t possible. How to:
Download FTP Client to Your Computer
You will need a trustworthy FTP client in order to install a WordPress theme via FTP. Install a popular client on your computer.
Create FTP Account from Your Hosting Control Panel
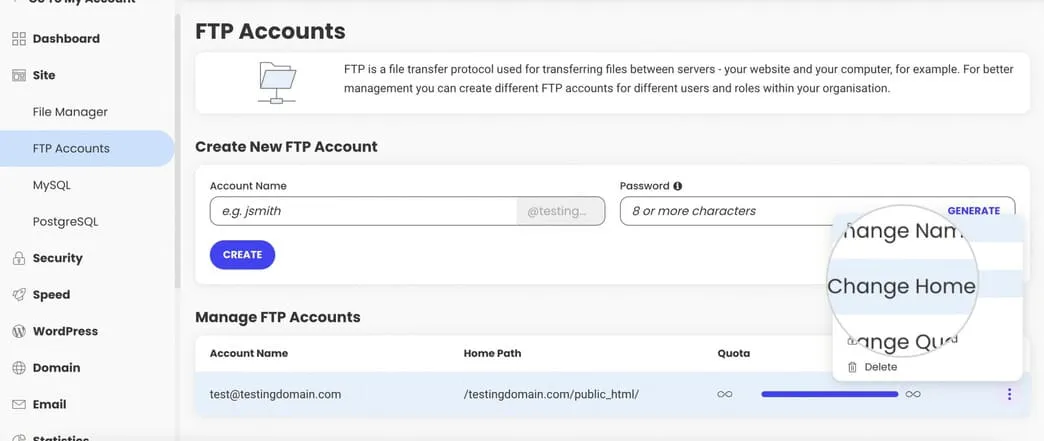
To set up an FTP account, go to your hosting panel. Here are comprehensive tips on setting up an FTP account provided by hosting companies such as SiteGround. The safe transfer of theme files is made possible via this FTP account, which serves as a conduit between your computer and the server.
Prepare Your Theme Files
Make sure your theme files are ready before learning FTP. Unzip the theme ZIP file you downloaded. This will expose a folder with all the theme files needed for install WordPress theme. This step prepares for a smooth FTP installation.
Connect to Your Server
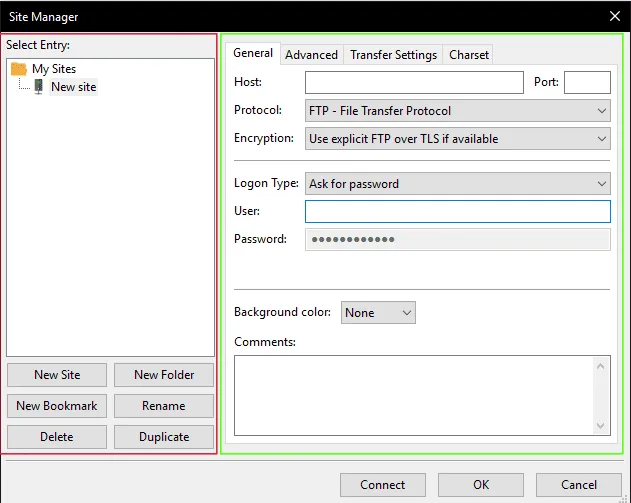
You must connect to your website’s server to install WordPress theme using FTP. FTP clients like FileZilla are reliable for this crucial phase.
Enter your hostname, username, password, and port number when starting the FTP client. This authentication technique establishes a safe and stable server connection and data transfer paths.
Navigate to the Themes Directory
After connecting to your website’s server, navigate its complex directory structure. Your destination is following:
wp-content/themes/The transformative install WordPress theme happens here, WordPress’s theme home.
Upload the Theme Folder
Uploading the theme folder is crucial. With the theme files unpacked and your FTP connection stable, move the theme folder to your server’s themes directory. The transformation begins with the careful transfer of these files, which capture your theme’s soul.
Activate the Theme
Activating the uploaded theme completes your work.
After uploading the theme folder, visit the WordPress Dashboard. The path leads to the “Appearance” component, specifically the “Themes” subsection. Your newly uploaded theme should now stand out among the others.
Tap the “Activate” button below the theme’s thumbnail to start this new visual aesthetics era. This click gives your website a fresh look that matches your theme’s appeal.
How to Activate a Premium WordPress Theme
Once you’ve become acquainted with the theme’s free version, let’s go to the detailed instructions for setting up a premium WordPress theme.
WordPress Dashboard: Click on the “Activate” Button
Navigate to your WordPress dashboard and find the theme you want to activate under “Appearance” You start the theme on your website by just clicking the “Activate” button. This stage, which applies to both premium and free themes, marks the beginning of your website’s visual makeover.
Enter the License Key
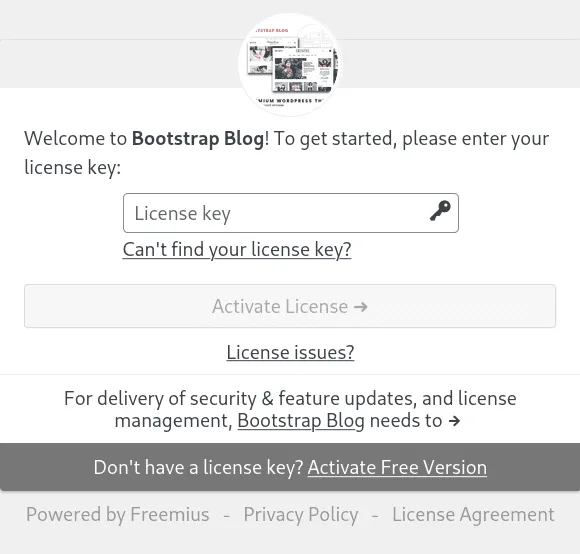
Upgrading to a premium theme typically entails receiving regular updates and extra features connected to a license key. After clicking the “Activate” button, enter the license key you received with your purchase. This crucial step assures that you will always have support and unfettered access to all of the premium features.
Choose Whether to Opt-in with Your Email
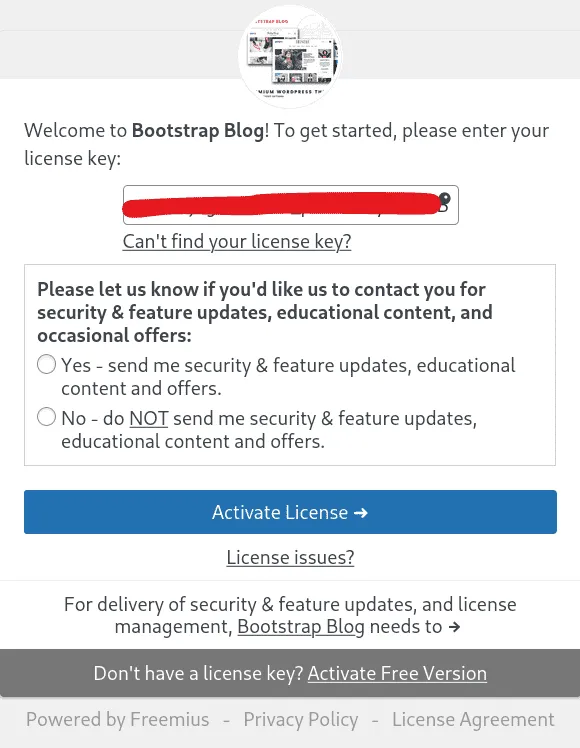
Certain premium themes could ask for your email address in order to send you updates, advice, and extra help. Think about if you want to opt-in, as this can be a useful way to receive info about theme updates and have access to certain help forums.
Start Customizing your Site
Your premium theme is now active once the license key has been input and, if applicable, the optional email subscription has been fulfilled. Now is the perfect moment to start the thrilling process of personalizing your website.
To start, make minor adjustments to the site’s title, slogan, and logo so that they complement your brand.
Customize Your Theme and Add Plugins
After activating your theme, the next steps are to adjust it so that it fits your own requirements and tastes. Explore the vast range of customization choices found in the WordPress dashboard. Unleash your imagination by experimenting with complex options in addition to fundamental features to make a website that is not only functional but also aesthetically pleasing and distinctively yours.
Discover the nuances of the customization panel, where you can adjust layouts for the best user experience, play around with fonts to create a consistent tone and adjust the color scheme to fit your corporate identity. To guarantee a unified and professional look, take the time to customize every element of your website, from header designs to footer information.
Final thoughts
With this guide, you can confidently install WordPress theme and activate themes to create a magnificent and engaging website that engages your audience.
WordPress Themes Repository is a useful tool to search WordPress Themes and check the reviews.
Install WordPress theme is simple and may be done in several ways. You can use the WordPress Dashboard or FTP client, depending on your needs and comfort level.


I’m not sure where you’re getting your info, but good topic.
I needs to spend some time learning much more or understanding more.
Thanks for fantastic information I was looking for this information for my mission.